
INTRODUCTION
Going forward, as part of the process of working for Laing O’Rourke you are required to pre-mobilise your plant items using the eify Plant Manager module. Laing O’Rourke has partnered with eify Pty Ltd and the Plant Management process will be carried out entirely online, through the website www.eify.com. This will simplify the process for Laing O’Rourke, and more importantly, for you.
These instructions are designed for people who will be managing the plant requirements of their company on site.
NB: These instructions assume that you already have a manager account setup for eify. If this is not the case please refer to the “eify – Laing O’Rourke - Subcontractor and Employee Registration Process – Simplified” instructions.
Accessing Plant Manager
Once you have an account and have logged in to www.eify.com you will need to navigate to the project you will be working on and then to the Manage Plant module. To do this:
- Choose the Client Laing O’Rourke by clicking or pressing this button:

- Click on the project that is relevant to you, if you can’t see the project button click on the “choose a project from this list” dropdown:

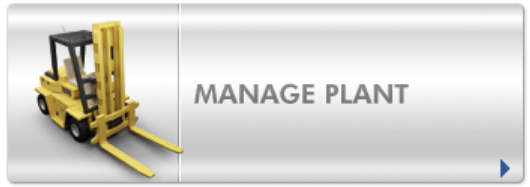
- To access the Plant Management module, select “Manage Plant” by clicking or pressing the button:
- This will take you to the plant management landing page. From here you will be able to create new plant and manage existing plant.
Purchasing Plant Tokens
The first thing you will be required to do is to purchase Plant Tokens for the project. To purchase Plant Tokens:
- Scroll over “Additional Options” and select “Purchase Plant Tokens”:

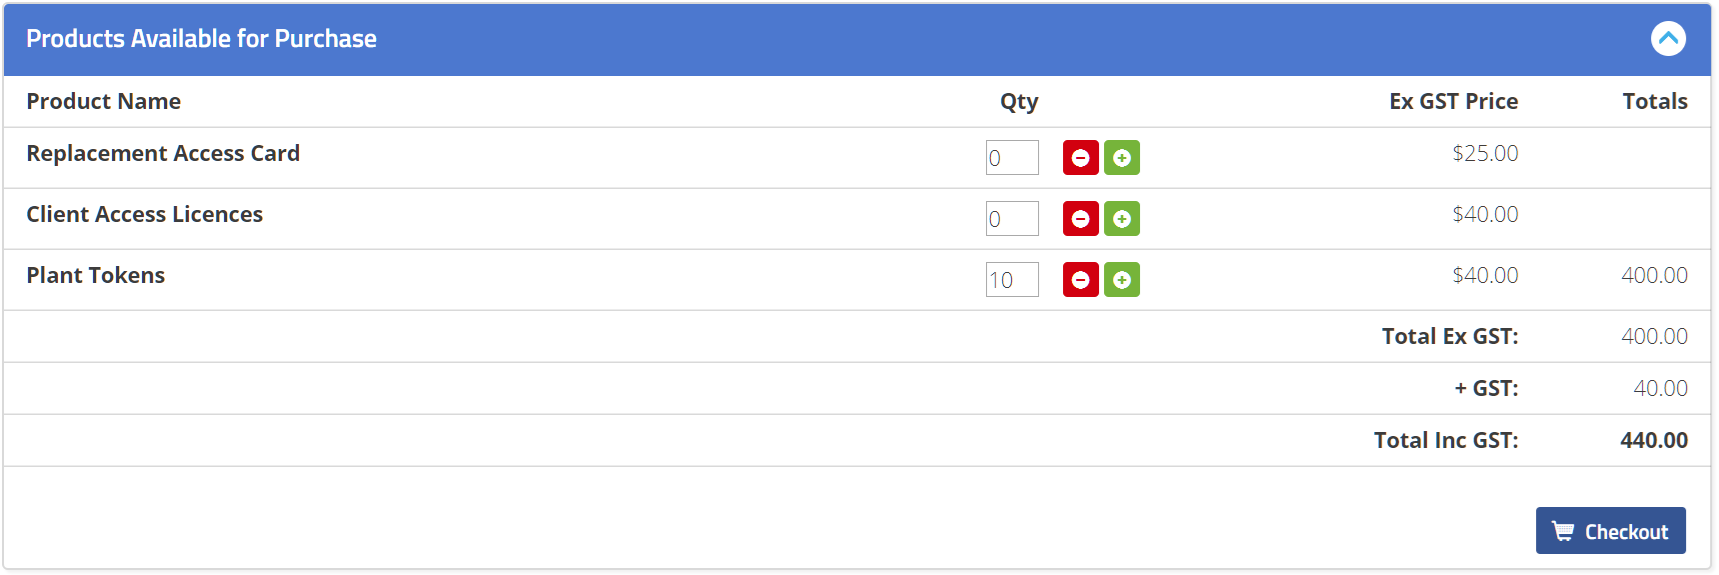
- Enter the amount of Plant Tokens you require by typing into the box or pressing the +/- buttons and then click on Checkout:
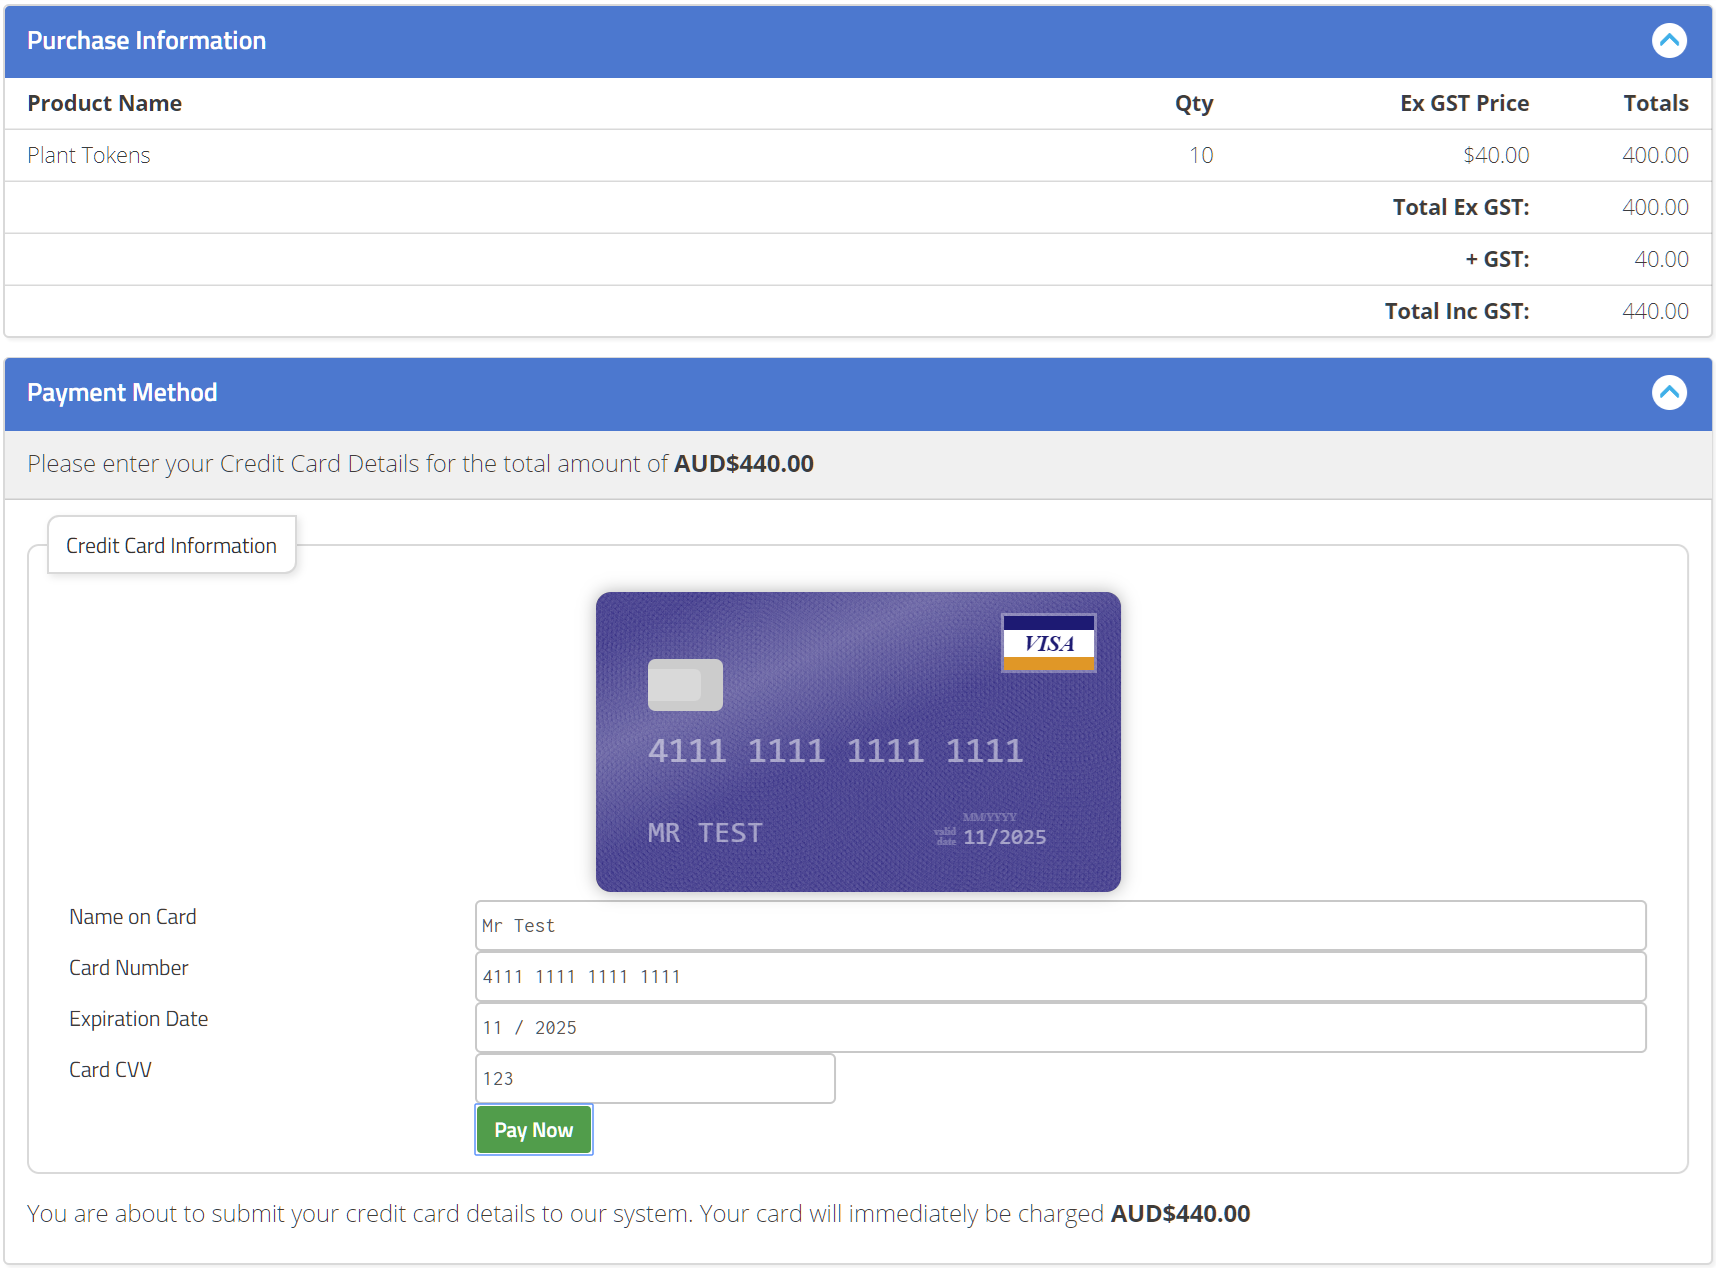
- Enter your credit card details and then click on Pay Now to process the purchase of the Plant Tokens:
Registering a Plant Item
Now that you have purchased Plant Tokens you are now able to register a plant item. To do this:
- Go to Additional Options > Add New Plant:

- Fill out the form for the details of the plant item and then click on “Create Plant”:

- You will then be redirected to the plant details for the newly created plant item
Completing plant setup
Now that the plant is registered, you are now required to upload the documents that meet the document requirements for that plant item. The process for this is:
- View the list of requirements for that plant item under the “Plant Documentation” heading:
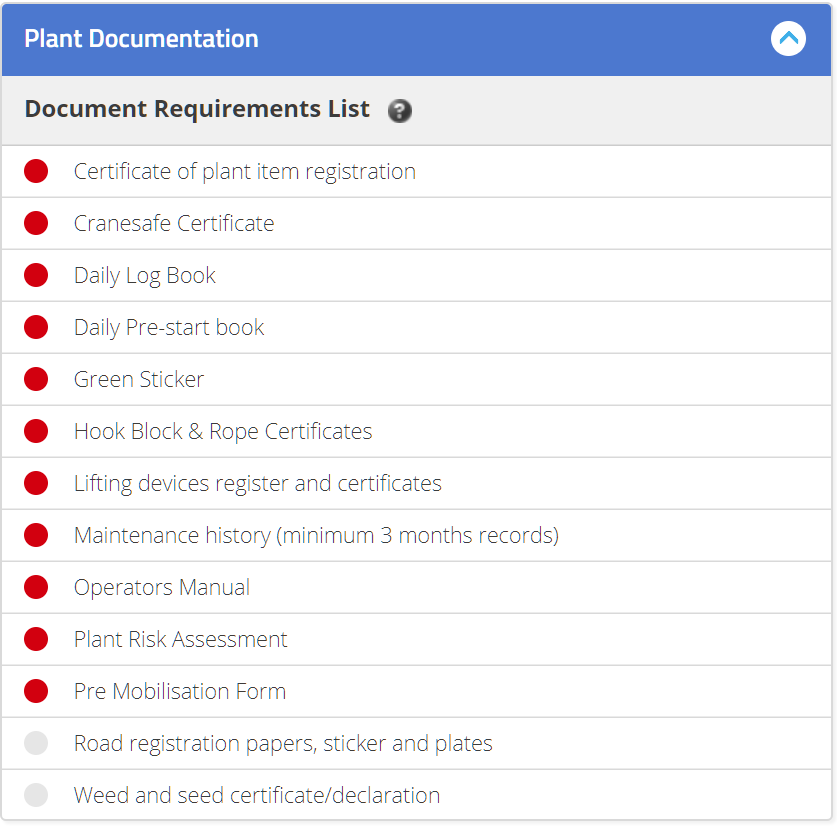
NB: This list will change based on the plant type
- Scroll down to the “Attached Documentation” section and click on the upload button highlighted below to upload a document:

- Once the document is uploaded you will be required to set the document type. To do this, click on the button and select the type from the dropdown list:

- Once the type is set the document will change to a status of “Pending Review”:
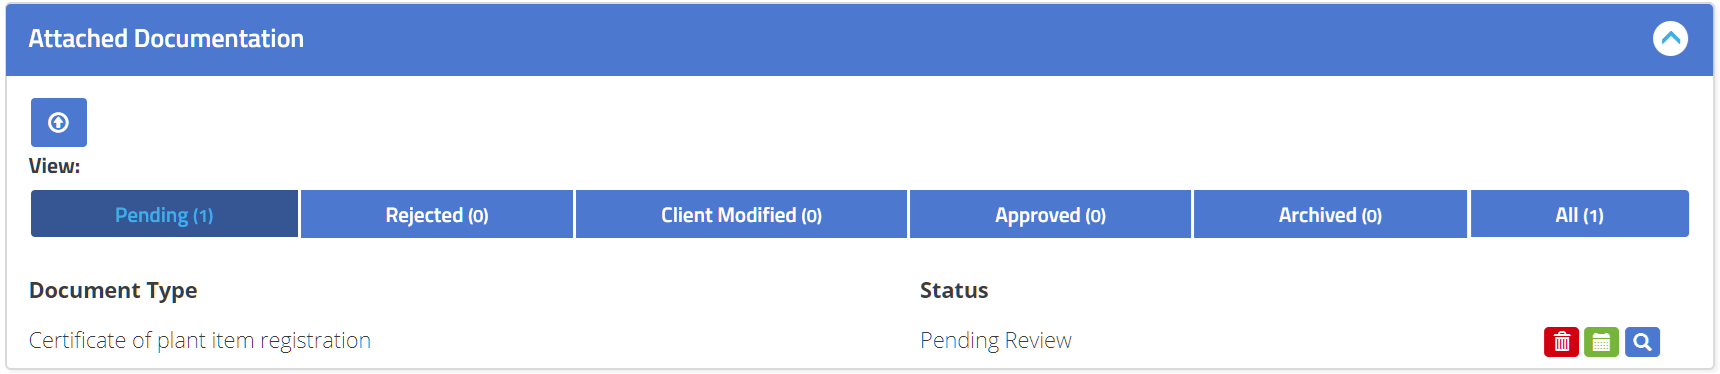
- You can delete the document by clicking on the red trashcan button or view it by clicking on the magnifying glass.
- Repeat the process above for each document in the “Documents Requirements List”
- Once all documents have been uploaded the plant item is ready to be reviewed by the Head Contractor and once this review is complete the plant status will change to “Approved” and is ready to take to site
Customer Support
If you or your employees need assistance with any part of the process, please contact eify Customer Support on 1300 579 803, or by accessing our support management system at support.eify.com or by email at support@eify.com. Customer Support is available from 6:00am to 7:30pm, Monday-Friday, and 8:00am to 12:00pm Saturday and Sunday, excluding public holidays in New South Wales.
Supported Internet Browsers
For Windows: Internet Explorer v9.0 or greater (Security Settings must be set at a maximum of Medium-High), Firefox v28.0 or greater, Google Chrome v33.0 or greater, Opera v19.0 or greater, Safari v6.1 or greater; for Mac: Firefox v28.0 or greater, Opera v19.0 or greater, Opera v19.0 or greater, Safari v6.1 or greater and Chrome v33.0 or greater.
Attached is PDF version
Comments
0 comments
Please sign in to leave a comment.